ISE: template di configurazione switches cisco sotto autenticazione tacacs radius
15.02 2024 | by massimilianoSTEP-1: creazione di un Network Device Profile Menù: Administration > Network Resources > Network Devices Profiles Network Device Profile = […]
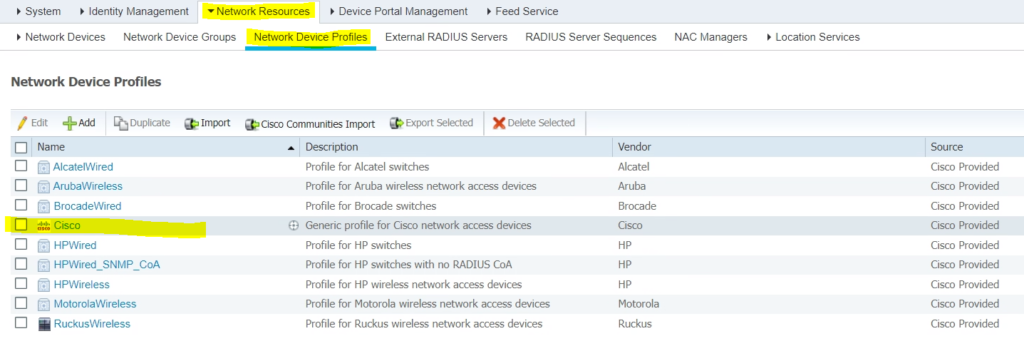
STEP-1: creazione di un Network Device Profile
Menù: Administration > Network Resources > Network Devices Profiles
Network Device Profile = Cisco
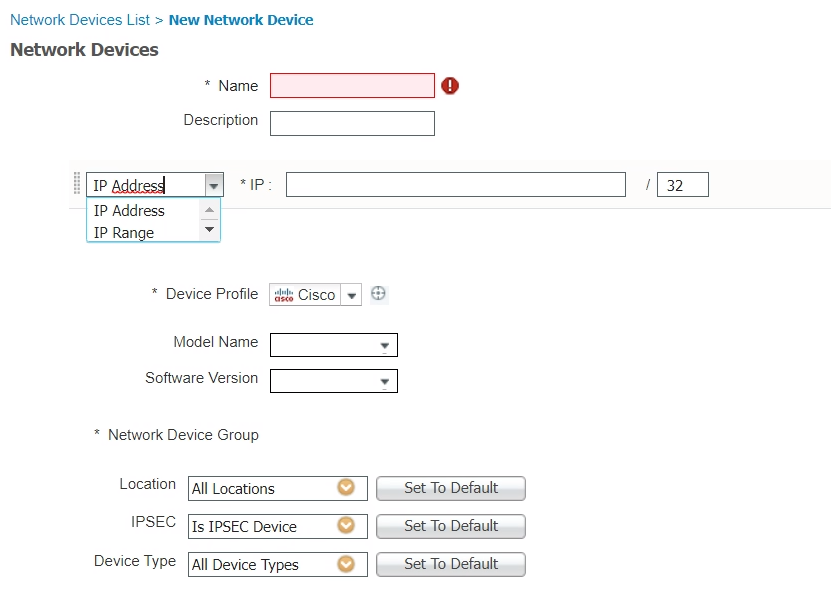
STEP-2: inserire un network device su ISE ed associarlo (mapping) al Network Device Profile
Inserire il device nel menù Administration > Network Resources > Network Devices > Add
Questa sezione permette di creare più gruppi di devices sulla base di differenti servizi/accessi/funzioni
Name: SWITCH-SERVICE-1
Description: Switch Service-1 Group
IP Address: < ip_address/mask >
Device Profile = Cisco
Model Name: n.a
Software Version: n.a
Location: set to default
IPSEC: no
Device Type: Switch
TACACS Authentication Settings: flag
Shared Secret: < secret-shared-password >
SAVE
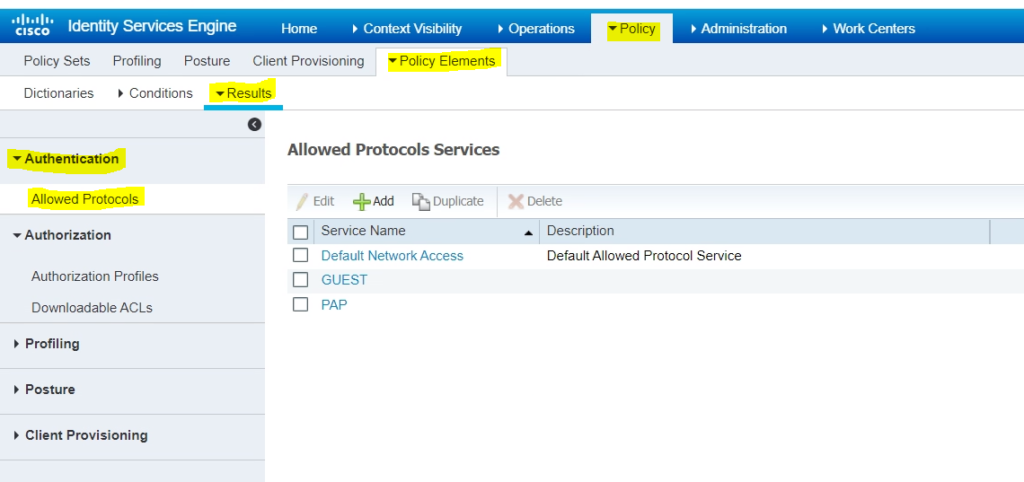
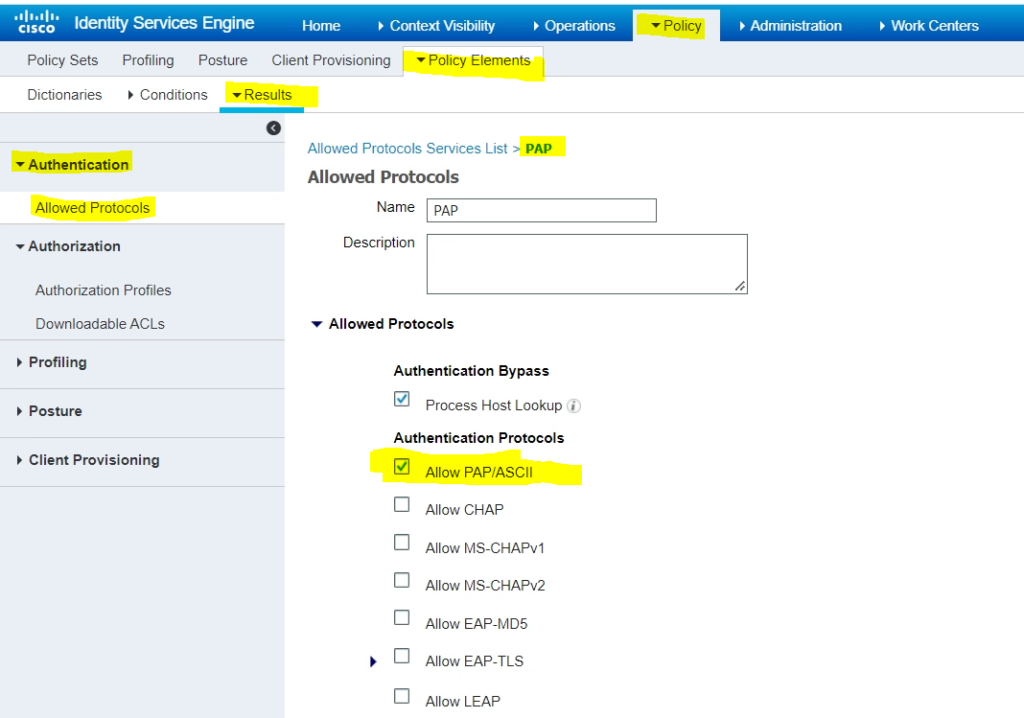
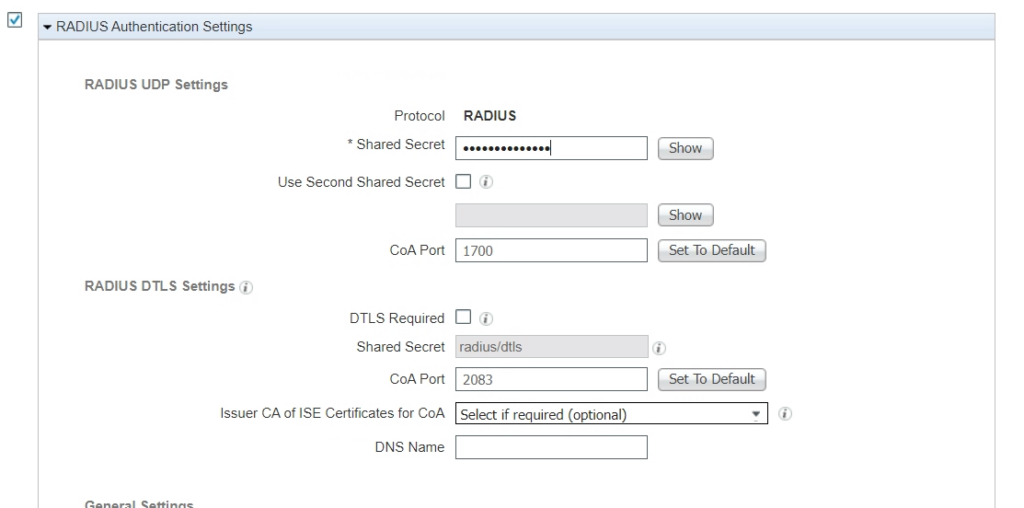
STEP-3: creazione di un Authentication Profile per abilitare il protocollo di autenticazione scelto (di default sono consentiti tutti i protocolli ad esempio PAP, CHAP, EAP-TLS, MS-CHAP, PEAP, etc…)
Menu: Work Center > Policy Elements > Results > Allowed Protocols > Add
Esempio di un RADIUS Authentication Settings
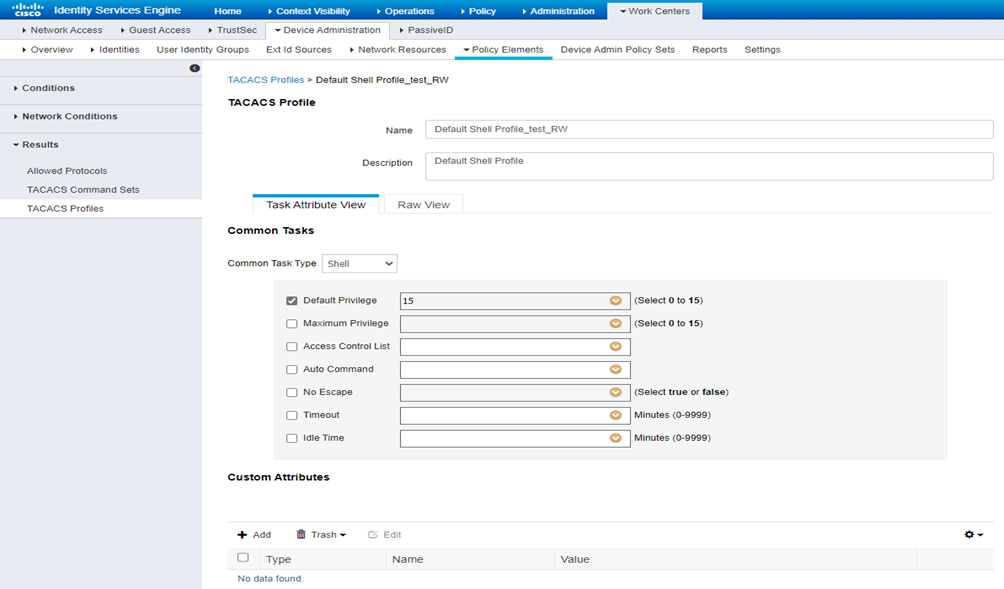
STEP-4: creazione di un Authorization Profile
Menù Work Centers > Policy Elements > Results > TACACS Profiles > selezionando i seguenti profili già creati:
Default Shell Profile_test_RO con Privilege = 1

Default Shell Profile_test_RW con Privilege = 15
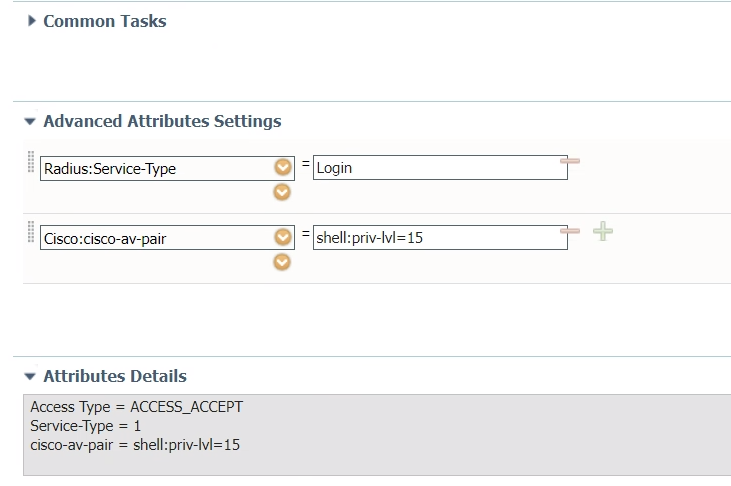
Esempio di Set Authorization Profile > Shell15
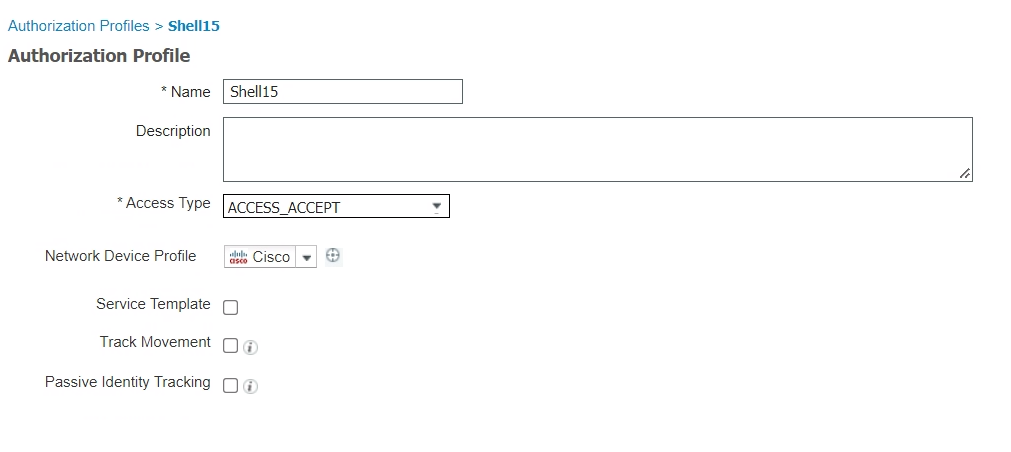
con Advanced Attribute Settings
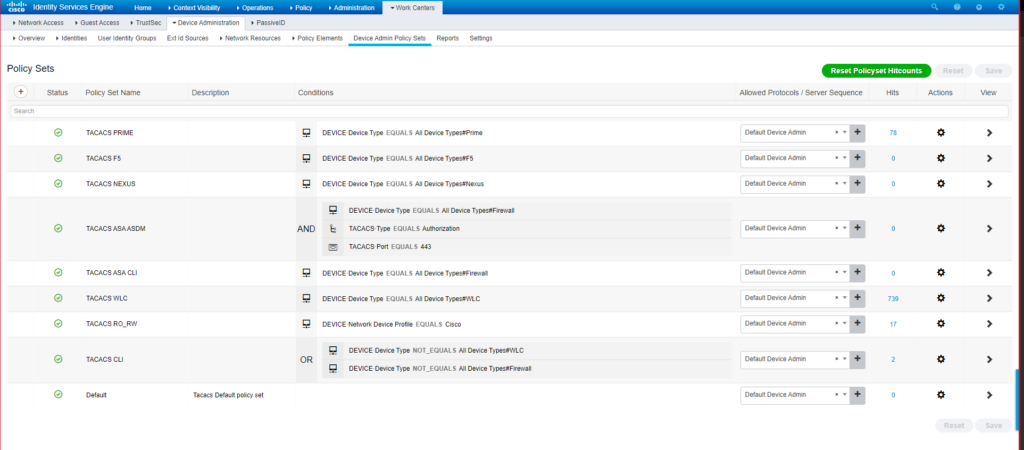
STEP-5: creazione di Policy Set che vada a richiamare Authentication Policy ed Authorization Policy
Menù: Work Centers > Device Administration > Device Admin Policy Sets, indicando il nome della policy
Policy Set Name = TACACS RO_RW
- Come Condition il Device Network Profile sia (equals) Cisco
- il protocollo abilitato sia quello creato in precedenza, ovvero quello scelto = PAP (potrebbe essere anche quello di default device admin).
STEP-6: configurazione Switch Cisco Legacy
aaa new-model
!
aaa group server tacacs+ DeviceAccess
server < ip_address_server_1 >
server < ip_address_server_2 >
!
aaa authentication login default group DeviceAccess local
aaa authentication login localauth local
aaa authorization console
aaa authorization exec default group DeviceAccess local
aaa authorization exec LOGIN local
aaa authorization exec localauth local
!
tacacs-server host < ip_address_server_1 > key < secret-shared-password >
tacacs-server host < ip_address_server_2 > key < secret-shared-password >
tacacs-server directed-request
!
line con 0
exec-timeout 60 0
authorization exec localauth
logging synchronous
login authentication localauth
line vty 0 4
exec-timeout 120 0
logging synchronous
length 0
transport input ssh
line vty 5 15
session-timeout 120
exec-timeout 120 0
length 0
transport input ssh
!
STEP-7: configurazione Switch Cisco Nexus
tacacs-server host < ip_address_server_1 > key 7 “< secret-shared-password >” timeout 10
tacacs-server host < ip_address_server_2> key 7 “< secret-shared-password > timeout 10
aaa group server tacacs+ DeviceAccess
server < ip_address_server_1 >
server < ip_address_server_2 >
!
aaa authentication login default group DeviceAccess local
aaa authentication login console local
aaa authorization config-commands default group DeviceAccess local
aaa authorization commands default group DeviceAccess local
aaa authentication login ascii-authentication
!
STEP-8: configurazione Switch Brocade
tacacs-server host < ip_address_server_1 >
tacacs-server host < ip_address_server_1 >
tacacs-server key < secret-shared-password >
!
aaa authentication login default tacacs+ local
aaa authorization exec default tacacs+
enable aaa console
!
ip tacacs source-interface ve 2001
!
crypto key zeroize # enable ssh per switch brocade
crypto key generate rsa # enable ssh per switch brocade
STEP-9: configurazione Firewall ASA Cisco AAA Tacacs
aaa authentication enable console TACACS LOCAL
aaa authentication http console TACACS LOCAL
aaa authentication ssh console TACACS LOCAL
aaa authorization command TACACS LOCAL
aaa authorization exec authentication-server auto-enable
aaa authorization http console TACACS
aaa authentication login-history
!
aaa-server TACACS protocol tacacs+
aaa-server TACACS max-failed-attempts 3
aaa-server TACACS (inside) host < ip_address_server_1 > tacacs-key < secret-shared-password >
aaa-server TACACS (inside) host < ip_address_server_2 > tacacs-key < secret-shared-password >
Note:
aaa-server TACACS protocol tacacs+
# abilita il protocollo tacacs+ ed utilizza il nome TACACS come servers group.
aaa-server TACACS max-failed-attempts 3
# specifica il numero massimo di tentativi per failure prima di definire il server non attivo; valore di default = 3.
aaa-server TACACS (inside) host < ip_address_server_1 > tacacs-key < secret-shared-password >
# specifica l’indirizzo ip del server tacacs e la sua chiave segreta; tra parentesi inside significa l’interfaccia dalla quale il firewall va ad interrogare il server tacacs.
aaa authentication enable console TACACS LOCAL
# istruisce il firewall ad usare per primo la enable password presente e memorizzata nel server tacacs e successivamente quella locale in caso di indisponibilità del server tacacs.
aaa authentication http console TACACS LOCAL
# per la gestione del firewall via http (corretto in caso di asdm).
aaa authentication ssh console TACACS LOCAL
# per la gestione del firewall via ssh
aaa authorization command TACACS LOCAL
# questo comando istruisce il firewall in termini di autorizzazione.