SDA cisco: DNA CENTER Provisioning UNDERLAY with LAN Automation (step)
16.02 2024 | by massimilianoQuesto parte prevede la procedura basata su Lan Automation. Lan Automation abilita il discovery dei devices compatibili per mezzo di […]
Questo parte prevede la procedura basata su Lan Automation.
Lan Automation abilita il discovery dei devices compatibili per mezzo di seed devices (il seed devices è lo switch madre dove tutti i nuovi, ed ancora non gestiti, devices si connettono per la loro automatizzazione in SD-Access).
CLI Credential e SNMP sono creati per mezzo di PnP Agent e la rete IP di management utilizzata come strumento di raggiungibilità dei nodi dal sistema DNA.
Le porte di un seed devices collegate ai nodi da discoverare debbono essere layer 2 mode e non debbono appartenere a reti OOB di management.
Di solito un seed devices ha configurato il vtp mode transparent e MTU = 9100.
Affinchè i devices da scoprire (discover) debbono lavorare in PnP agent con nessuna pre-configurazione, qualsiasi precedente configurazione fatta deve essere cancellata (restore) allo stato compatibile con il PnP agent e pertanto Cisco prevede la seguente configurazione in config-mode ed exec-mode:
sw(config)# config-register 0x2102
sw(config)# crypto key zeroize
sw(config)# no crypto pki certificate pool
sw# delete /force vlan.dat
sw# delete /force nvram:*.cer
sw# delete /force nvram:pnp*
sw# delete /force flash:pnp*
sw# delete /force stby-nvram:*.cer
sw# delete /force stby-nvram:*.pnp*
! previous two lines only for HA systems
write erase
reload
Nota by Cisco:
Do not save the configurations for the reload process; to prepare switch stacks for LAN Automation, use the same restoration commands for each switch in the stack.
Switch stacking requirements do not change for LAN Automation—all switches in a stack must be running the same software license and version supporting IP routing features.
If you desire the most control over port numbering and stack behavior, then in advance of starting the LAN Automation process, you can adjust the switch stack numbering and also influence a switch to become the ACTIVE role within a stack through an increased priority by using the following commands in exec mode:
switch [switch stack number] renumber [new stack number]
switch [switch stack number] priority 15
If a golden image has been tagged as described in the previous procedure, image upgrade will occur during LAN Automation if the discovered device is running in INSTALL mode.
If the golden image has been tagged and the discovered device is running in BUNDLE mode, LAN Automation will fail for the device.
LAN Automation Provisioning
Identificare uno o più devices in Inventory ed assegnare loro il ruolo di SEED per site; questo stesso seed devices può essere usato per multipli Lan Automation scope, permettendo ai devices rilevati di essere assegnati a differenti building.
Step-1: navigate to Provision > Inventory > select the devices > Action > Provision > Assign Device to Site > Apply
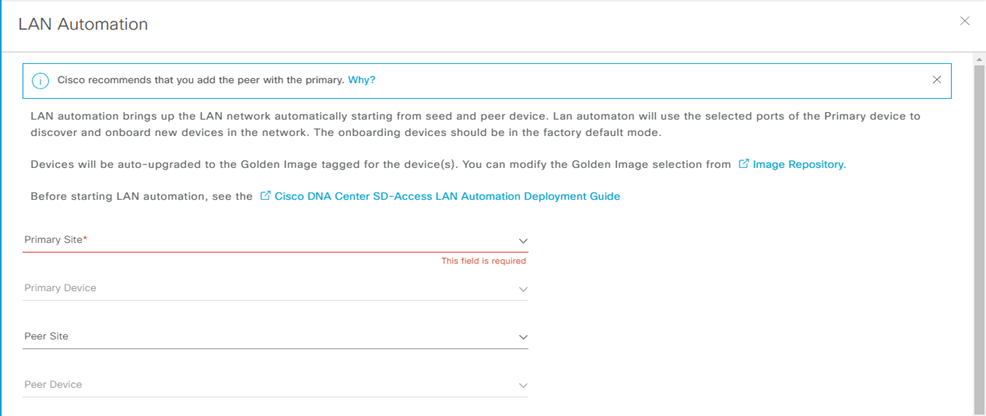
Step-2: navigate to Provision > Inventory > Action > Provision > Lan Automation
Enter:
- Primary Site:
- Primary Devices:
- Peer Site:
- Peer Devices:
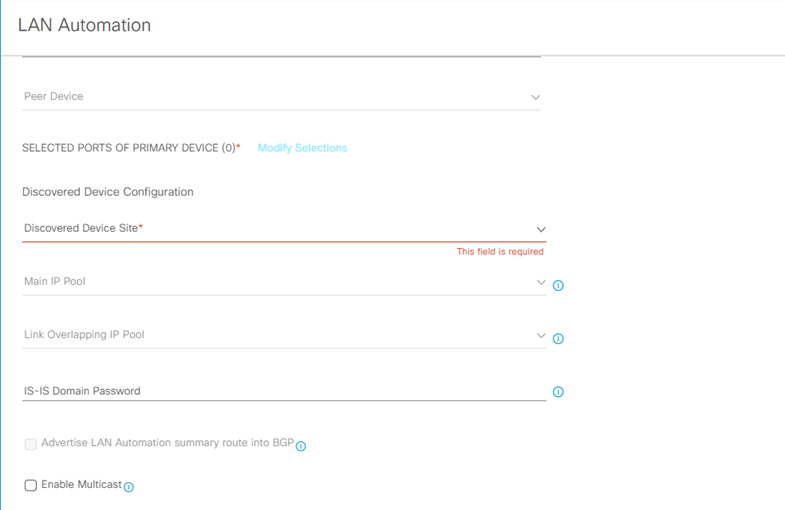
SELECTED PORTS OF PRIMAR DEVICE (0)

Discovered Device Configuration
- Discovered Device Site:
- Main IP Pool: (the main ip pool is used for the devices management IP and DHCP server; it is also used for links and if the a link overlapping IP pool is not provisioned)
- Link Overlapping IP Pool: (provide this pool if you want to use the same IP pool at different site)
- IS-IS Domain Password: (lan automation use this password if it is used by seed devices)
- Advertise Lan Automation summary route into BGP: (if BGP is operational on the primary device and peer devices, then add a summary route for the selected main IP pool into BGP on the primary and peer device)
- Enable Multicast: enable underlay native multicast, configure seed devices as RP and configure discovered devices as subscriber to multicast traffic
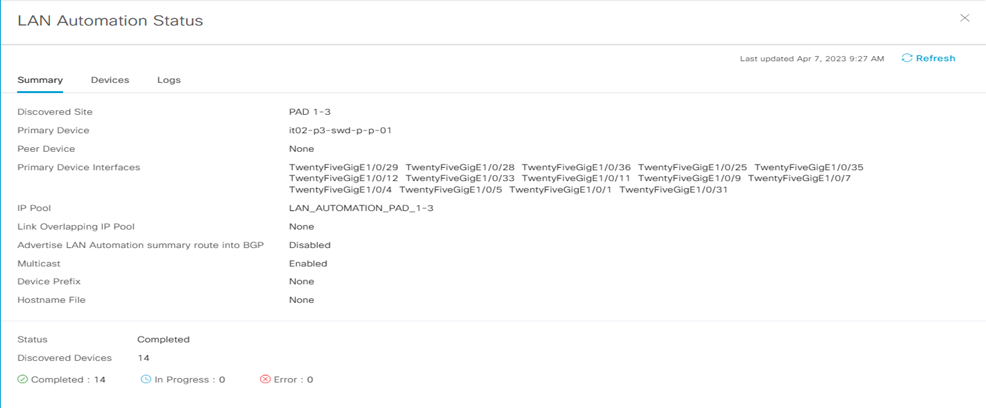
LAN Automation Status
Step-3: navigate to Provision > Inventory > Action > Provision > Lan Automation Status
Verifica Summary:
Verifica Devices
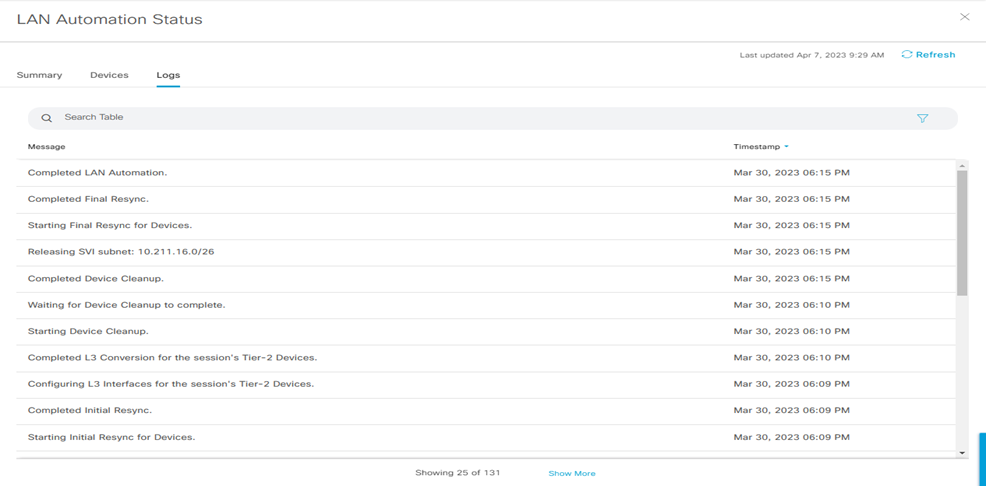
Verifica Logs
Nota:
LAN Automation realizza il discovery dei devices attraverso la Vlan di default VLAN1 ed il protocollo ISIS underlay per la raggiungibilità dei devices da scoprire.
Quest’ultimi sono inseriti e gestiti nella lista di Inventory.
LAN Automation Topology
Step-1: navigate to Tools > Topology > Global
Step-2: navigate to Tools > Topology > Hierarchy sites
Provisioning Device Role
Step-3: navigate to Tools > Topology > select each site > select each node > Network Role
Provisioning Device and assign to Sites
Step-4: navigate to Provision > Inventory > select (filter) the devices > Action > Provision > Assign Devices to Site
Enter
Choose a floor

Step-5: click next and skip on Configuration > Advanced Configuration > Summary
- Verifica la configurazione per ciascun devices
- Click Deploy
- Apply
Il Provisioning comincia a lavorare.
Step-6: Ripetere l’operazione per ogni devices che è stato aggiunto; DNA-Center pxGrid integration aggiorna, quindi, i devices in ISE.
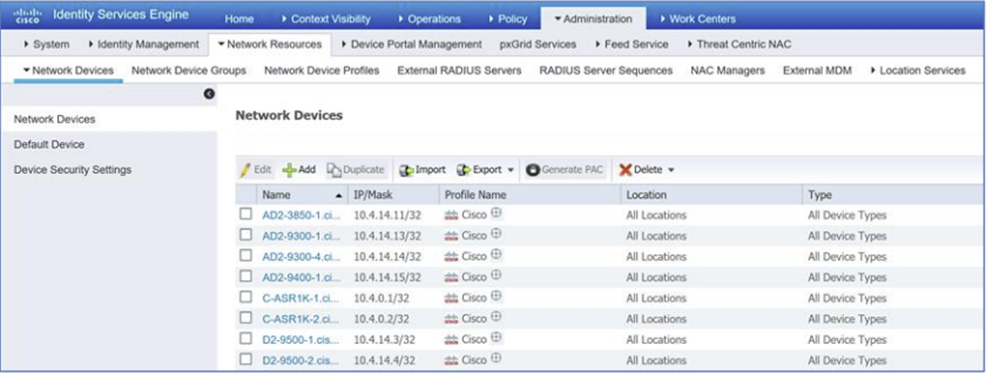
Step-7: verificare che i devices sono stati aggiunti ad ISE, andando su ISE to Administration > Network Resources > Network Devices.
Provisioning WLC Integration
Step-1: navigate to Provision > Inventory > select (filter) the WLC > Action > Provision > Configure WLC HA
Nota:
in HA mode, il WLC è visto come una singola entità logica in SD-Access; verifica la configurazione in HA SSO andando a cliccare il device name eppoi High Availability tab.
Step-2: Assign the site e ripetere quindi l’operazione vista in precedenza per questo punto.
Il WLC è assegnato to the site ed il provisioning comincia a lavorare; utilizza il Refresh button sino a che il Provision Status mostra il Success prima di procedere.